Disassemble A Glock At-A-Glance
- Always clear and double-check the chamber before disassembly
- Glock field stripping requires no tools for basic maintenance
- Pull the trigger before removing the slide. This is normal
- Field stripping is enough for cleaning; full teardown is optional
- Reassembly is the reverse of disassembly
RELATED: How To Paint A Glock Slide
In this article:
How to Disassemble a Glock (Step-by-Step Field Strip Guide)
Knowing how to properly disassemble a Glock is a basic skill every responsible owner should have. Whether you’re cleaning your handgun, inspecting parts, or performing routine maintenance, field stripping a Glock is simple once you understand the process.
This guide walks you through how to safely disassemble a Glock step by step, using clear instructions and practical tips, no gunsmith experience required.
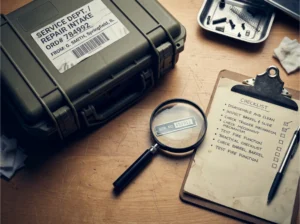
Safety First: Read Before You Start
Before disassembling any firearm, safety comes first.
- Always point the Glock in a safe direction
- Remove the magazine
- Lock the slide back
- Visually and physically check the chamber to confirm it’s unloaded
- Keep your finger off the trigger until instructed
Never skip these steps. Most Glock disassembly accidents happen because the chamber wasn’t checked.
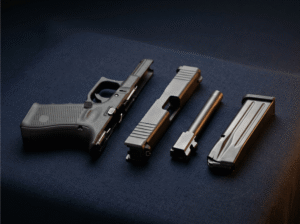
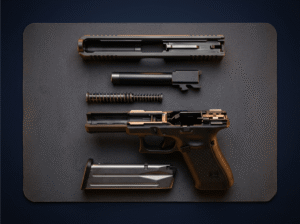
What Does “Field Stripping” a Glock Mean?
Field stripping a Glock means breaking it down into its main components for cleaning and inspection:
- Slide
- Barrel
- Recoil spring assembly
- Frame
This is not a full teardown. A field strip is all you need for routine maintenance and is what Glock recommends for regular cleaning.
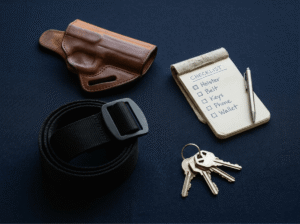
Tools You’ll Need
Most Glock models can be field stripped without tools, but having a few basics helps:
Glock Cleaning Supplies :
- Glock Armour’s Tool or a 3/32 punch
- Small flat-head screwdriver
- A pair of needle-nose pliers
- Small bench block or a roll of duct tape
Step-by-Step: How to Disassemble a Glock
Step 1: Remove the Magazine and Clear the Chamber

Remove the magazine and rack the slide several times. Lock the slide open and visually inspect the chamber to confirm it’s empty.
Step 2. Remove the Barrel

Next, you need to pull the trigger, then pull the slide back about a quarter of an inch. Bring your take-down levers down, then pull your top barrel assembly off.
Now, set the barrel aside.

- Great Product
Last update on 2026-07-24 / Affiliate links / Images from Amazon Product Advertising API
Step 3. Push the Lock Pin Out

Brace the lower part of the gun onto a bench block or a roll of duct tape.
We will drive the pin from the left side of the firearm out to the right side. We also start by pushing the locking block pinout.
No products found.
Step 4. Push the Trigger Pin Assembly and the Trigger Pin Out


Push the trigger assembly pinout. Next, push the trigger pinout. You may want to take your slide stop and wiggle it to make sure it comes out properly.
Wiggling the slide stop allows the spring to not put pressure on the pin.
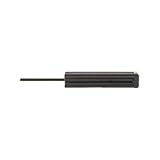
- Glock disassembly tool
- Black finish
- The tool measures approximately 3 5/8'' from end to end
Last update on 2026-07-24 / Affiliate links / Images from Amazon Product Advertising API
Step 5. Remove Slide Stop and Locking Block


You can now remove the slide stop. Then take your amour’s tool and lift your locking block. It will just pop right out.
RELATED: Is the Glock 43 the Must-Have Handgun?
Step 6. Remove the Trigger Assembly

Now we’re going to remove the trigger assembly. Pull the ejector gently, then the whole trigger assembly will come right out.
Step 7. Disassemble Trigger Mechanism

To disassemble the trigger mechanism, pull your trigger bar out and bring the crucible up. Now you’ll see the trigger spring.

It needs to be in an “S” shape when you reinstall it and when you take it out. Remove the spring from the trigger bar, then take out the spring.

- Measures 12" Diameter
- Brushed Aluminum Sign
- Predrilled Hole for Mounting
Last update on 2026-07-24 / Affiliate links / Images from Amazon Product Advertising API
Step 8. Remove the Connector

Now it is time to remove the connector. Current model Glocks have a small hole to push the connector out.
For older model Glocks, you can use a flathead screwdriver to take the connector out.
Step 9. Remove Slide Lever Lock

Now we’re going to remove the slide lever lock. There is a spring retaining your lock, and you just need to push it down and go to the side, wiggle it, and it will fall right out.
Step 10. Pull the Spring Out

Take a flathead screwdriver and lift the spring a bit. With the use of your needle-nose pliers, pull the spring right out.
Step 11. Remove the Magazine Catch

This time, we’ll remove the magazine catch, and we have to do it through the magazine well. You’ll notice a rod–which is the spring for the magazine catch.

Bring the rod over to the slot on the side and just pop your spring out. Then you just push the mag catch button through.
To remove the spring, use your needle-nose pliers and just pull it out.

- GLOCK magazine pouch
- Holds up to 10 GLOCK magazines
- GLOCK Logo on Flap
Last update on 2026-07-24 / Affiliate links / Images from Amazon Product Advertising API
Optional: Further Frame Disassembly (Advanced)
Disassembling the frame beyond a field strip involves removing pins, the trigger assembly, and internal components. This is not necessary for routine cleaning and should only be done if you’re comfortable working with Glock internals.
If you choose to proceed, use a proper Glock punch and work slowly to avoid damaging pins or springs.
Reassembly: Putting Your Glock Back Together
Reassembly is simply the reverse process:
- Insert the barrel into the slide
- Reinstall the recoil spring assembly
- Align the slide with the frame rails
- Pull the slide fully to the rear and release
Perform a basic function check to ensure everything operates correctly.
Common Glock Disassembly Mistakes to Avoid
- Failing to clear the chamber
- Pulling the slide back too far when engaging the slide lock
- Losing control of the recoil spring
- Forcing parts that don’t move freely
If something doesn’t feel right, stop and reassess.
Safe Field Stripping for Long-Term Reliability
Disassembling a Glock doesn’t require special skills, just patience, attention to safety, and an understanding of the process. Once you’ve done it a few times, field stripping becomes second nature and helps ensure your Glock stays reliable for years to come.
Regular maintenance isn’t just about performance. It’s about safety and confidence every time you pick up your firearm.
Why Proper Glock Disassembly Matters for Safety and Performance
Have your own Glock disassembly tips or tricks?
Drop them in the comments and help other Glock owners learn the right way to maintain their pistols. If this guide helped you, consider sharing it with a fellow shooter.
Watch this hickok45 Glock cleaning video for step-by-step Glock slide disassembly instructions:
Up Next:
- Glock Pistols: Why Are They Still So Popular?
- Glock 19 Gen4 9x19mm | Gun Carrier Handgun Review
- Interstate Driving While Carrying A Firearm: What You Need to Know
For awesome survival gear you can’t make at home, check out the Survival Life Store! Follow us on Facebook, Instagram, Twitte
FAQ: Glock Disassembly
How do you disassemble a Glock safely?
To disassemble a Glock safely, remove the magazine, clear the chamber, point the firearm in a safe direction, pull the trigger, retract the slide slightly, pull down the slide lock, and remove the slide from the frame.
Do you need tools to field strip a Glock?
No, Glock pistols are designed to be field-stripped without tools. A punch is only needed for deeper internal disassembly.
Why do you have to pull the trigger to disassemble a Glock?
Pulling the trigger releases the firing pin, allowing the slide to move forward off the frame. This is part of Glock’s design and is safe when done correctly
How often should you disassemble and clean a Glock?
Glocks should be field stripped and cleaned after every range session or every few hundred rounds, depending on use and environment.
Is it safe to fully disassemble a Glock at home?
Basic field stripping is safe for most owners. Full disassembly should only be done if you understand Glock internals or are following a trusted guide.