Key Facts on How to Thread a Barrel
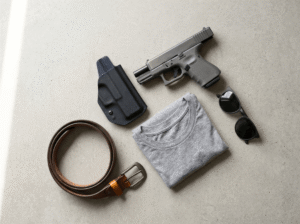
The article provides a guide for DIY barrel threading using manual tools (taps and dies) rather than a lathe. This method is primarily used to add muzzle brakes, flash hiders, or suppressors to firearms. This method is a budget-friendly way to add a muzzle brake to a “beater” rifle, but for high-end builds or suppressors, the risk of permanent damage outweighs the cost of a professional gunsmith.
RELATED: AR-15 Barrel Install | Tips & Tricks
⚠️ CRITICAL WARNING: READ BEFORE PROCEEDING
Threading a firearm barrel is a high-precision task that involves significant safety, legal, and financial risks. By following this guide, you acknowledge and assume full responsibility for any damage to your equipment, personal injury, or legal consequences.
In this article:
- Required Tools for DIY Threading Barrels
- These Extra Tools Are Also Recommended for Muzzle Threading
- Important Preparations on How To Thread A Barrel
- How To Thread A Barrel Step-by-Step Guide
- Factors to Keep in Mind When Threading Barrels
- Finishing Up
How To Thread A Barrel: AR 15 Barrel Threading
Threading barrels helps make sure your suppressors and muzzle brakes fit and work. Learning how to thread a barrel is a handy skill every gun enthusiast needs to learn.
Click here to jump to the instructographic.
Required Tools for DIY Threading Barrels
- Different taps and dies
- Thread pitch
- Vice grip
Note: Depending on the rifle you have, you will need a different thread pitch.
These Extra Tools Are Also Recommended for Muzzle Threading:
- Cutting oil
- Paintbrush
- Hand towels
- Firearms cleaning kit and toolkit
- Measurement tool, e.g., dial caliper
- Spare cutting tools (if possible)

- Steel construction caliper 6" dial
- Precision Ground Jaws for Accuracy
- Jaws Designed for Inside, Outside, and Thread Measurements
Last update on 2026-07-20 / Affiliate links / Images from Amazon Product Advertising API
CRITICAL SAFETY: Never consume alcohol or mind-altering substances while performing gunsmithing. This process requires 100% focus and steady motor skills. A single slip of the hand can permanently ruin a barrel or lead to a catastrophic failure during live fire.
Editor’s Offer: If You Are Opposed To Using Deadly Force To Protect The Lives Of Yourself Or Your Loved Ones, Then This Weapon Is NOT for You!
Important Preparations on How To Thread A Barrel
Measure the diameter of your firearm’s barrel before starting. Then cross-reference that information with the specifications list at CNC Warrior’s website.
CNC Warrior provides barrel threading kits for a variety of firearm platforms in a wide range of calibers. They also provide specification lists with firearm make and models detailing each barrel thread pitch.
Of course, these specifications follow factory models. So, make sure your firearm is a factory model.
An example of this is a Norinco MAK-90 AK47. A factory barrel will need a thread pitch toolkit of a 14X1 LH (Left Hand).
CNC Warrior provides these same specifications as a ‘shortcut’ to measuring your barrel. But regardless, the best advice is to use the list as a source for cross-referencing your findings.
The barrel threading kit from CNC Warrior comes with a guide, cutting tool, cutting oil, and a fitted handle for the job to get done. No instructions come with the toolkit, though, but there are many videos popping up online that provide do-it-yourself examples.
FEDERAL LAW WARNING: Before cutting or threading, ensure your final barrel length remains compliant with the National Firearms Act (NFA). For rifles, the barrel must be at least 16 inches long; for shotguns, 18 inches. Measuring from the closed bolt face to the muzzle. Threading a barrel that results in a length shorter than the legal limit without an approved ATF Form 1 is a federal felony.
RELATED: Rifle Shooting Tips & Techniques | 11 Surprising Things New Rifle Shooters Need To Know
How To Thread A Barrel Step-by-Step Guide
NOTE ON CONCENTRICITY: Using a hand die and TAT (Threading Alignment Tool) is generally acceptable for mounting flash hiders or muzzle brakes. However, if you intend to use a suppressor, hand-threading is high-risk. Suppressors require the threads to be perfectly concentric to the bore, which is best achieved using a lathe. If threads are even slightly canted, you will experience a ‘baffle strike,’ which can destroy your suppressor and void its warranty.
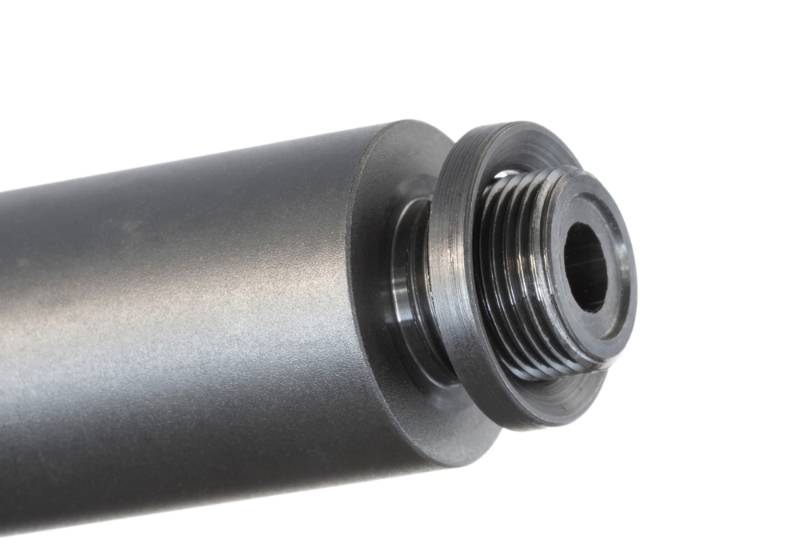
To get started, fit the guide through the cutting tool. You need the guide to thread through the cutting tool itself and place it concentrically to the barrel. Make sure all the components are well-oiled with the cutting oil before starting.
- Once on the barrel, begin the thread cutting process by turning in the direction of the thread pitch, e.g., left-hand or right-hand.
- For every half turn, reverse the direction to break off the freshly cut chip, then proceed back forward, cutting in the proper direction.
- Repeat this process for every half turn with due diligence and patience. A single mistake during this process can risk the firearms’ integrity and performance.
- Once there are three to four thread cuts made, remove the tool and the guide, then repeat the process without the guide. The guide tool is no longer needed at this point. This is because the first few thread cuts are enough to complete the rest of the job with proper alignment.
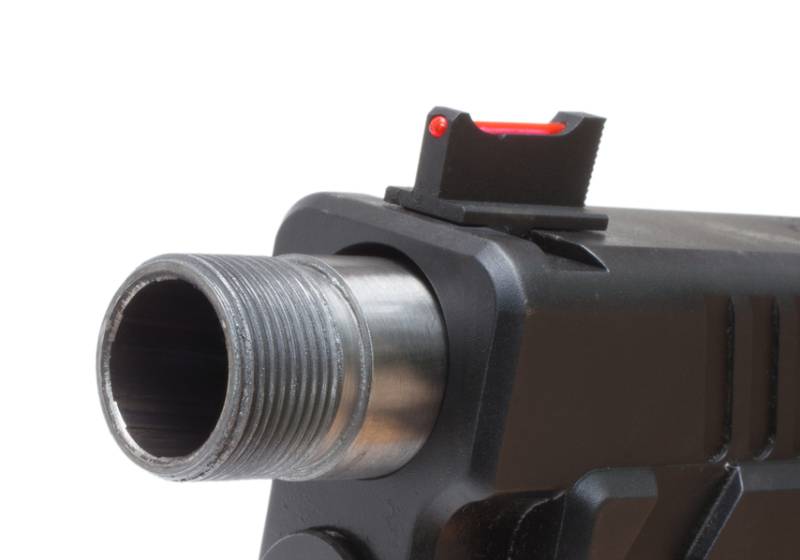
When finishing the threads near the barrel shoulder, ensure the die makes full, flat contact. If the shoulder of the barrel is uneven or rounded, the muzzle device will not sit straight. If you cannot achieve a perfectly square shoulder by hand, you may need to use a ‘jam nut’ or a ‘crush washer’ to help timing, though a machined shoulder is always preferred for suppressed fire.

Last update on 2026-07-20 / Affiliate links / Images from Amazon Product Advertising API
Factors to Keep in Mind When Threading Barrels
- Besides patience and caution, make sure all the components are well-oiled and lubricated with the cutting oil throughout the process. If the components are not lubricated, the cutting tool can chip and damage the barrel during the cutting process.
- Use a paintbrush to wipe away the excess chips that build up during the cutting process. It is important to use a paintbrush as opposed to an air gun because the metal chips can easily get into an eye, risking possible permanent injury.
- Do not rush the process. You can use minor distractions to calm your excitement.
The point is to take minor breaks to keep excitement or boredom under control during the process. It prevents rushing the task, which may risk permanent damage to the barrel of the firearm.
- Precision is important, as a minor kink in the thread pitch can damage the entire firearm. This is when one round fires through a muzzle brake or suppressor that’s not in proper alignment.
- Upon finishing up, remove the cutting tool with as much upward pressure as possible. This works by pulling upwards on the tool with the opposite hand, spinning the tool off the threaded barrel.
Finishing Up
Remove all the excess metal chips and cutting oil with a paintbrush, then remove the firearm from the vice.
Before assembling the firearm, clean it well, including the bore, barrel, gas system, and internal moving components. If the firearm is not clean, then shooting the weapon will be at risk of damage.
This is because the metal chips will scratch and damage important moving components operating within the weapon. These metal chips can also ruin the rifling of the barrel, reducing accuracy, trajectory, and even velocity.
Once the firearm is clean, thread the muzzle brake or suppressor onto the barrel. Lock it down with a crush washer or the notch located on most AK47 gas blocks.
Once the muzzle device is installed, do not rely on a visual check or a cleaning cord. Use a precision-ground Suppressor Alignment Rod (matching your caliber) inserted through the device and into the bore. The rod should be perfectly centered within the exit aperture. If the rod touches the side of the muzzle device or suppressor, do not fire the weapon.

DIY threading barrels for muzzle brakes and suppressors is a tedious task. Yet, it’s vital in the care and maintenance of your weapons.
With owning guns, care, maintenance, and upgrades are tasks you need to learn and do by yourself!
Precision Over Convenience
Threading your own barrel is a rewarding milestone for any DIY enthusiast, but it’s a task where the margin for error is thinner than a single metal shaving. While the “hand-threading” method is a functional way to customize a rifle, it is not a shortcut for everyone. The difference between a perfectly timed muzzle brake and a catastrophic suppressor baffle strike often comes down to two things: technical patience and legal awareness.
By prioritizing bore concentricity over outside diameter and strictly adhering to NFA length requirements, you ensure that your firearm remains both a high-performance tool and a legal asset. Remember, gunsmithing is an art of measurement: measure three times, cut once, and always keep the “cool beverages” for the victory celebration after the tools are put away and the workspace is clear.
Join the Conversation: How Many are Threaded?
Now that we’ve audited the process and tightened up the safety standards, we want to hear from the community. In the original guide, we asked: How many of your guns are threaded? Whether you used a professional gunsmith with a lathe or took the DIY route with a die and TAT, we want to know about your setup. Did you run into any alignment issues, or did you nail it on the first try?
FAQ
-
Can I thread a rifle barrel at home without a lathe?
Yes, you can use a manual die and a Threading Alignment Tool (TAT) for a DIY approach. While this method is budget-friendly for installing muzzle brakes or flash hiders, it lacks the absolute precision of a lathe. It is vital to move slowly and use plenty of cutting oil to avoid “tearing” or galling the steel.
-
What is a Threading Alignment Tool (TAT) and why is it necessary?
A TAT is a caliber-specific pilot that fits into the bore and holds the threading die square to the barrel. Without a TAT, it is nearly impossible to start threads straight by hand. Even a slight tilt will cause your muzzle device to sit crookedly, potentially leading to a catastrophic baffle strike or accuracy issues.
-
Is hand-threading safe for mounting suppressors?
Hand-threading is extremely risky for suppressors. These align with the barrel’s outside diameter, but the bore is rarely perfectly centered. For suppressors, threads must be concentric to the bore to prevent “baffle strikes.” Professional lathe threading is the only reliable way to ensure your expensive suppressor isn’t destroyed during the first few shots.
-
What are the most common thread pitches for rifles?
Thread pitch depends on the caliber. The most common for .223/5.56 (AR-15) is 1/2″-28, while .30 caliber rifles typically use 5/8″-24. Many AK-47 variants use a metric 14×1 LH (Left Hand) thread. Always use a dial caliper to verify your barrel’s outside diameter before purchasing a specific die and TAT kit.
-
How do I ensure my barrel length remains legal?
Per the National Firearms Act (NFA), rifle barrels must be at least 16 inches long. Measure by inserting a dowel into the barrel until it hits the closed bolt face, then mark it at the muzzle. If your threading project results in a shorter length, you have created an illegal Short-Barreled Rifle (SBR), a federal felony.
-
Why is high-quality cutting oil so important?
Cutting oil is non-negotiable. It reduces friction, dissipates heat, and flushes away metal chips that could otherwise “gall” or tear the threads. Without high-quality sulfurized cutting oil, the die will likely chatter, leading to rough, weak threads that may prevent your muzzle device from seating properly or staying secure under the high pressure of fire.
-
What is a “baffle strike,” and how do I avoid it?
A baffle strike occurs when a bullet’s path is not perfectly centered, causing it to hit the internal discs of a suppressor. This usually happens due to non-concentric threads or an un-squared barrel shoulder. It results in the total destruction of the suppressor and can be extremely dangerous to the shooter and nearby bystanders.
-
Can I use a bore snake to verify thread alignment?
No. Do not use a bore snake; its flexibility makes it useless for checking alignment. Instead, use a precision-ground alignment rod matching your caliber. Insert it through the muzzle device into the bore. The rod must be perfectly centered in the exit hole. If it touches any side, your threads are canted.
-
Should I drink alcohol to “stay calm” while threading?
Absolutely not. Gunsmithing requires precision, patience, and sharp motor skills. The suggestion to use alcohol to “stay calm” is dangerous advice that compromises safety and judgment. One slip of the hand can ruin an expensive barrel or lead to a legal or medical disaster. Always stay 100% sober when working on firearms.
-
What if my barrel is made of hardened steel or is Nitrided?
Many modern barrels feature Nitride (Melonite) or Chrome-lining, which are extremely hard surfaces. Attempting to thread these with a standard HSS die often results in a ruined tool and “torn” threads. If your barrel is hardened, you likely need a carbide-tipped tool or a professional gunsmith with a lathe to achieve a clean cut.
Would love to see some diverse perspectives on this. Share your thoughts below.👇