
Springfield Armory was nice enough to send me one of their newest 1911 pistols, and I’m happy to report that, so far, the handgun they sent runs flawlessly with all types of ammo. I have only had one malfunction so far to report, and I attributed it to the cheap ammo I was using.
There is something about this 1911 style pistol that is different from most of the others out there, and I wanted to address it in an entirely different article because I feel that being able to clean your gun is important.

The take down of the Springfield Armory EMP 4 is a bit contrary to some other 1911s on the market, today. Whereas in a lot of these pistols, the barrel bushing needs to be rotated in order to begin the field stripping process, this one requires the use of a little “L” shaped tool to release the tension on the recoil spring.

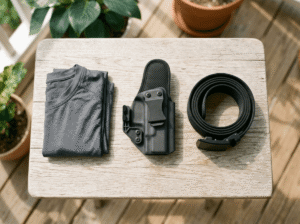
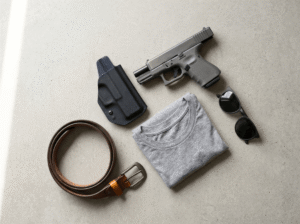
If you’ve never taken one down before, the video at the top, coupled with this article and the photos we put together will help you tremendously, should you decide that this is the pistol for you (to be quite honest, it is a fantastic carry gun that I’ve been trusting my life with since they’ve sent it to me).
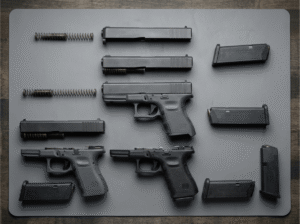
Let’s field strip this Springfield Armory EMP 4 Lightweight Champion:
The first step whenever you’re cleaning any firearm, is to unload, show-clear. In other words, physically and visually make sure that the firearm is unloaded. When you do, just lock the slide in the rear-ward position, which is necessary for take down.
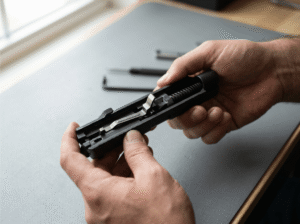
This 1911 has no barrel bushing to rotate, but it does have a little hole on the recoil spring guide rod. You need to stick the little “L” shaped tool into that hole, like so:


After this point, you may slowly release the slide, and then align the little notch with the slide release, as shown here:

From here, flip the pistol over to find the other side of the slide release lever, and push on it (it’ll look like a little button). You may then flip it back over, and grasp it with your finger tips, pulling it out. You may need to wiggle it a bit in order to get it out, just be careful not to scratch the frame’s finish.

From this point, you can pull the slide off of the frame. Set the frame off to the side, for the time being. Now, you have the slide assembly in front of you, and may push the recoil spring and guide rod toward the back of the slide, until it comes free and lifts out. Take notice of the little notch that must rest on the barrel when you put it back together.


The last step is to remove the barrel. The barrel comes out the front of the slide, but will not do so until you push the barrel lug down. From this point, you may clean your pistol.

Reassembly is just the opposite of the take down—which I won’t discuss except for one thing: You must make sure that the barrel lug (or link, if you prefer) is properly lined up with the slide release hole, or it won’t go in right. To make it easier, make sure the lug is standing up as you’re putting the slide and the frame back together.

After reassembly, make sure you do a function check to make sure that it still performs properly. A function check is simple. With the gun still unloaded (or with snap caps), put it in your strong hand, pull back and release the slide. Pull the trigger, and keep it pressed without releasing it. Pull the slide back again, and then let go of the trigger.
What you’re listening for, is the hammer to drop (when pulled) and for the trigger to reset (when released). You should be able to see and hear the hammer (or pin, if striker fired) drop. And, you should also be able to hear the trigger reset when you let it go. If these things don’t happen, there is an issue. I’ll usually do this 3 or 4 times after I clean any of my guns—unless it is a gun that cannot be dry fired—but all of my modern day guns are fine to be dry fired.
Please make sure you leave a comment telling us what you thought about this article in the comments below. Let us know if this is the sort of thing you’re interested in learning from us, here at Gun Carrier. Then, please make sure you subscribe to Gun Carrier’s YouTube channel to make sure you don’t miss the actual review of this gun.