
Fast Facts about Home Drills
Dry-fire can make your concealed-carry draw smoother without “tacticool” fluff. This guide gives three at-home drills that reliably carry over: a consistency-focused draw, a sight/dot-friendly press-out, and a first-shot trigger-prep routine. Each drill includes safety rules, reps, and progressions you can confirm at the range.
Related: One-Handed Shooting Tips
Safety First: Set the Rules Before You Set a Timer
Before we talk drills, lock down the one thing that makes dry-fire worth doing: safety. A dry-fire session should feel boring and repeatable, not improvised.
Dry-fire safety checklist (non-negotiable):
- Unload completely: magazine out, chamber empty, then physically and visually confirm.
- Remove all live ammo from the room, including loaded mags.
- Choose a safe direction and a backstop (something that would safely stop a bullet if the impossible happened).
- Pick a simple target (3×5 card or dot). Avoid anything that resembles a person.
- If you get interrupted, stop and restart your safety check before continuing.
- Reholster slowly. Speed on the reholster is not a skill you need.
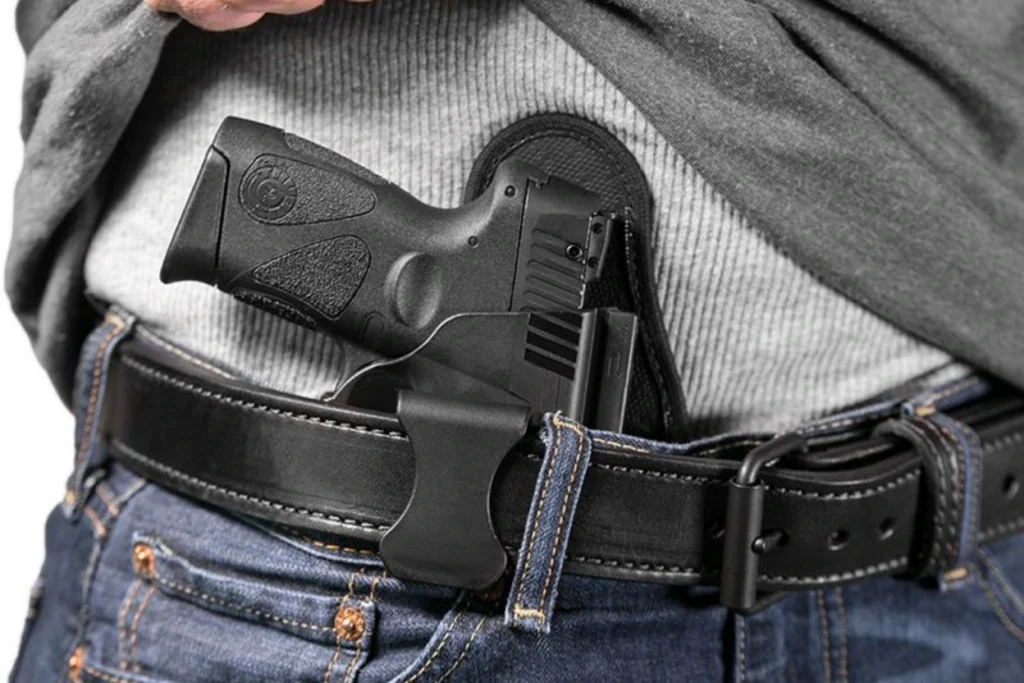
Holster note: Use a quality holster that covers the trigger guard fully and holds its shape. If your holster collapses when the gun is out, it’s not a great choice for repeated dry-fire reholstering.
How Should You Set Up Dry-Fire Practice for Concealed Carry?
Dry-fire “works” when it matches your real carry setup. If you practice in gym shorts with a different belt and a different holster, your brain learns a different draw.
Use this quick baseline:
- Wear what you carry in. Belt tension, cover garment, and holster position matter.
- Use a small target on the wall at eye level: a 3×5 card, a 2-inch dot, or a sticky note corner.
- Start from a normal stance: hands relaxed, not “ready position.”
- Focus on smooth and consistent first. Speed comes after.
Optional, not required:
- A par timer (or shot timer app) to keep you honest.
- A small notebook or notes app to track reps and what felt off.
Drill 1: How Do You Build a Consistent Concealed-Carry Draw? (10 Perfect Draws)
The first drill is about consistency. If your grip is different every time, everything that follows becomes a salvage job. This is the “tune-up” that makes the other drills better.
What this drill improves
- A garment that is clear and doesn’t snag
- A consistent master grip in the holster
- A clean draw path without extra motion
How to do it (step-by-step)
- Start from concealment, hands relaxed.
- Clear the garment the same way every rep.
- Establish a master grip before the gun leaves the holster.
- Draw to a high chest “workspace” briefly.
- Press out to full extension and stop (no trigger press yet).
Reps and sets
- 3 sets of 10 reps
- Rest 30–60 seconds between sets
- If a rep feels sloppy, don’t “count it” as one of your 10.
Cues that matter
- “Grip first, speed later.”
- Keep your shoulders relaxed.
- The gun should move on a simple track: up, then out.
Common mistakes (and fixes)
- Fishing for grip: Slow down and build the grip before the draw.
- Inconsistent garment clear: Pick one method and commit.
- Rushing the first inch: The first inch sets the whole rep.
Progression
Once 10 reps look identical, introduce a comfortable par time and try to beat it only while staying clean. If you start missing grips, you’re going too fast.
Bottom line: The draw isn’t fast because you rush. It’s fast because you don’t have to fix anything mid-draw.
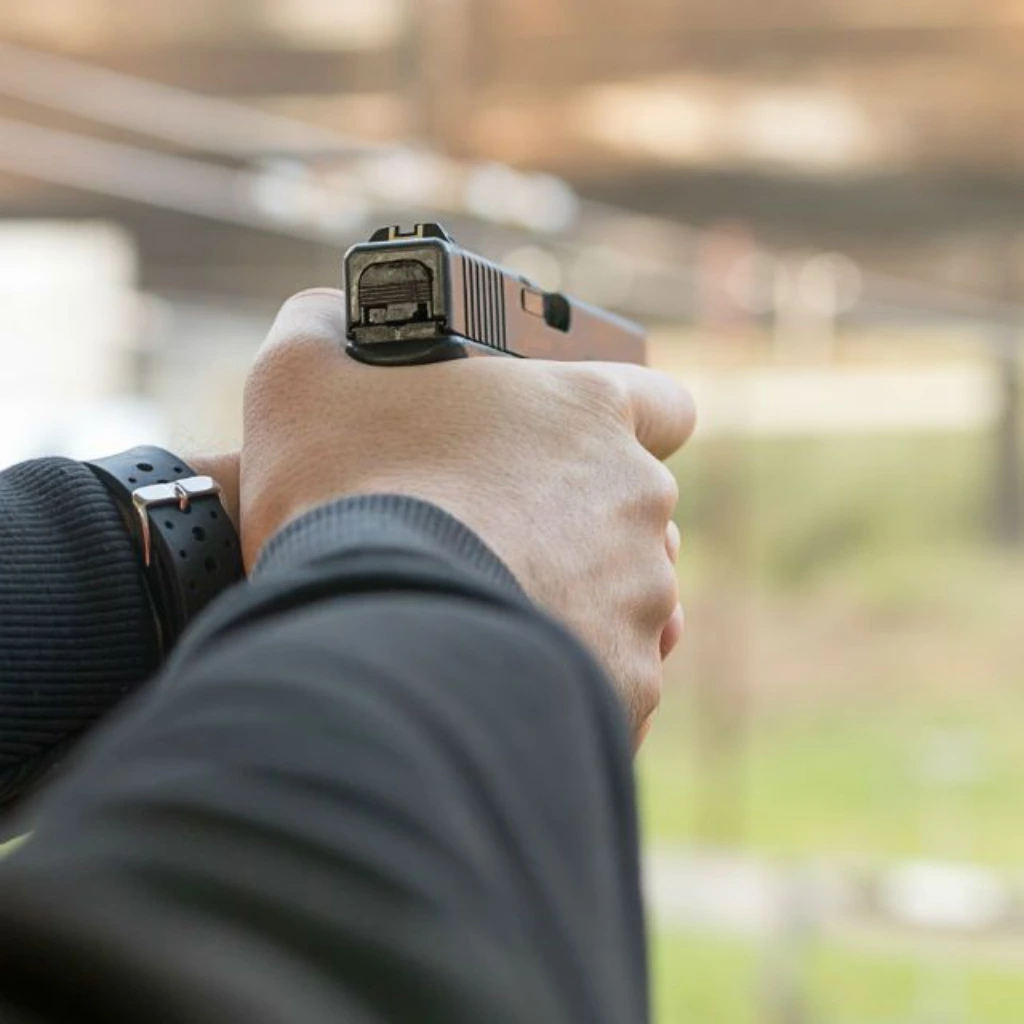
Drill 2: What Dry-Fire Drill Fixes “Dot Fishing” or Sight Hunting? (Press-Out Confirmation)
Now that the draw is more consistent, shift your focus to the moment most carriers “lose time”: the last part of the presentation. If you extend the gun and then hunt for the sights or dot, you’re adding a correction step.
What this drill improves
- A presentation that finishes on target
- Better sight alignment without last-second steering
- Less “dot fishing” if you carry a red dot
Setup
- Put a 3×5 card or 2-inch dot on the wall at eye level.
- Stand close enough that you can see what the sights/dots are doing clearly (distance isn’t the point here).
How to do it
- Start from concealment.
- Draw to your workspace and begin the press-out.
- As you extend, watch alignment settle.
- Pause for a brief one-count with sights/dot on the target.
- Reset safely and repeat.
Reps and sets
- 2 sets of 10 reps (20 total)
Cues that matter
- “Eyes lead, gun follows.”
- Bring the gun to your line of sight. Don’t crane your neck to meet the gun.
- The sights/dots should “show up” early, not at the very end.
Common mistakes (and fixes)
- Overextending then correcting: Slow down the last 20% of extension.
- Muzzle dip on extension: Think “level track” to the target.
- Dot fishing: Confirm your head position is consistent and your press-out is straight.
Progression
Shorten the pause over time. When it’s stable, add a second card a few inches away and do clean transitions: press out, confirm, shift eyes, confirm.
Bottom line: The fastest sight picture is the one you don’t have to chase.
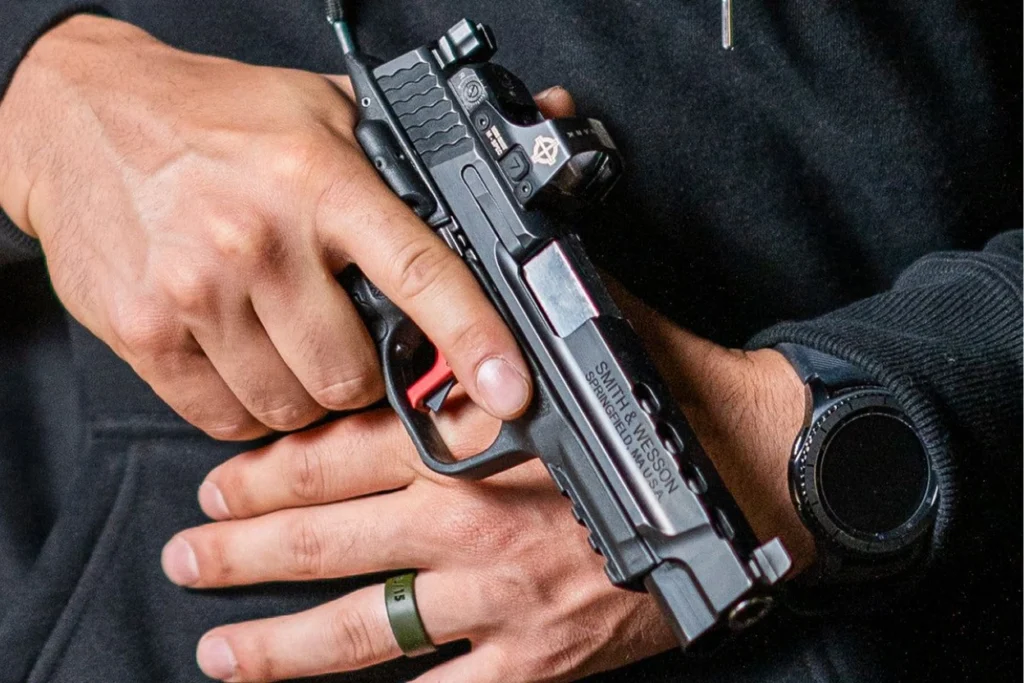
Drill 3: How Do You Train a Clean First Shot in Dry Fire? (First-Shot Readiness)
This is where dry-fire pays real dividends. Most “first shot problems” aren’t a mystery. They’re usually a mix of rushed trigger work and a grip that changes under pressure. This drill teaches you to keep discipline and consistency when it matters most.
What this drill improves
- Safe trigger prep timing
- A cleaner first-shot press
- Less flinchy, grabby “panic press” behavior
Important note before you start
Your finger stays off the trigger until your sights/dot are on target and you’ve made the decision to press. That’s the habit we’re reinforcing.
How to do it
- Start from concealment.
- Draw and confirm sights/dots on the target.
- Prep the trigger to the wall (or through take-up) only after sights are steady.
- Press straight back without trying to be fast.
- Reset safely and repeat.
Reps and sets
- 15–25 quality presses total
- Stop if you feel yourself rushing or “snatching.”
Cues that matter
- “Press, don’t slap.”
- Keep the sight picture steady through the press.
- Your support hand stays firm; don’t crush harder during the press.
Common mistakes (and fixes)
- Prepping too early: If you prep before sights are on, slow down and rebuild discipline.
- Whole-hand squeeze: Focus on isolated trigger finger movement.
- Trying to “beat the beep”: Save par times for after you can press without disturbing sights.
Progression
Mix in “no-press reps” (present and confirm, then stop) so you don’t train yourself to press automatically every time the gun comes up.
Bottom line: First-shot readiness is mostly trigger discipline plus a repeatable press.
What Is a Simple 10-Minute Dry-Fire Routine for Concealed Carry?
You don’t need marathon sessions. You need consistency. This plan is short enough to actually happen on a weeknight and structured enough to build real skill.
A simple 10-minute routine (3–4 days per week)
- 2 minutes: safety check + setup
- 3 minutes: Drill 1 (10 perfect draws)
- 3 minutes: Drill 2 (20 press-out confirmations)
- 2 minutes: Drill 3 (15–25 prep + press reps)
Track one thing
After each session, write:
- What felt best
- What felt off
- What you’ll fix next time
This tiny habit keeps you from doing “random reps” forever.
Range Bridge: How to Confirm This Carries Over (Low Round Count)
Dry-fire is practice. Range time is proof. A short, structured live-fire check helps you verify that your at-home work is showing up where it counts.
A simple 30-round confirmation
- 10 rounds: draw to one careful first shot at 3–5 yards (accuracy first)
- 10 rounds: draw and shoot one round into a 3×5 card (or small circle)
- 10 rounds (optional): add a timer only if accuracy is solid
Range rule note: Only draw from a holster where it’s allowed and where you can do it safely.
When Gear Gets in the Way: Fix the Friction, Not Your Standards
If your holster shifts, collapses, or forces awkward movement, you’ll feel it in every rep. That’s not “being picky.” That’s your setup telling you it’s not stable enough for consistent work.
Quick gear reality check
- Holster covers the trigger guard fully
- It stays open for safe, slow reholstering
- It doesn’t shift around on the belt
- It conceals comfortably enough that you’ll actually wear it
If you’re constantly adjusting your rig during the day, your draw will be inconsistent at night.
Your Carry Draw Doesn’t Need Hype, It Needs Reps
Most permit holders don’t need a new tactic. They need a simple system they’ll repeat. If you can commit to 10 minutes a few times a week, these three drills can tighten your draw, clean up your presentation, and make your first shot feel more “ready” and less rushed.
Make It a 7-Day Tune-Up Challenge
Pick three days in the next week and run the 10-minute routine exactly as written. Write down one win and one fix after each session. Then, on your next range trip, run the 30-round confirmation to see what carried over. For more training guides and carry gear deep-dives, explore Gun Carrier’s training and concealed-carry content hubs.
Check out this video from USCCA about The BEST Dry Fire Drills From A Former Navy SEAL:
FAQs
1) How often should I dry-fire for concealed carry?
Three to four short sessions per week are plenty for most carriers. Aim for 10 minutes, not an hour. Consistency builds better habits than occasional “big” practice. If you feel sloppy or distracted, stop early. Clean reps matter more than high rep counts
2) Do I need a shot timer for dry-fire?
No. A timer helps only after your reps are consistent and safe. Early on, focus on smooth mechanics and repeatable grip. If you do use a timer, treat it like a metronome, not a scoreboard. Speed gained through sloppiness won’t carry over well.
3) What’s a good par time for a concealed draw?
There isn’t one perfect number because clothing, holsters, and skills vary. Start with a par time that lets you complete perfect reps without rushing. Then reduce it gradually. If your grip degrades, your sights wander, or you rush the trigger, your par is too aggressive.
4) Should I practice reholstering fast?
No. Reholstering fast is one of the easiest ways to create a negligent discharge risk. The draw may need to be quick, but the reholster should be slow, deliberate, and visually verified when possible. Your goal is safe control, not a “fast rep” to finish the drill.
5) What target should I use for dry-fire at home?
Use a small, simple target that gives clear feedback: a 3×5 card, a 2-inch dot, or a small piece of tape. Keep it at eye level so you don’t build a habit of dipping your head. Avoid human-shaped targets for at-home dry-fire practice.
6) Is dry-fire safe for my pistol?
In most modern centerfire pistols, occasional dry-fire is generally fine, but it depends on the design. Check your manual and manufacturer guidance. If your pistol requires snap caps for dry-fire, follow that. When in doubt, limit reps and confirm with the maker rather than guessing.
7) How do I stop “dot fishing” with a red dot?
Dot fishing usually comes from an inconsistent head position or a curved press-out. Keep your posture consistent, bring the gun up to your eye line, and extend straight toward the target. Use Drill 2 with a brief pause to confirm the dot appears naturally. Slow is smooth here.
8) What if my cover garment keeps snagging during the draw?
First, standardize your garment-clearing method and practice it slowly. If the garment still catches, consider whether the fabric, length, or belt setup is causing the issue. Many carriers improve consistency by using the same style of cover garment most days. Also, check that the holster ride height helps.
9) Can I dry-fire with a loaded magazine in the gun?
You shouldn’t. For safe dry-fire, remove the magazine, clear the chamber, and keep all live ammo out of the room. A loaded magazine nearby increases the risk of a mistake, especially if you get distracted. Build a routine that is boring, consistent, and hard to mess up.
10) How do I know these drills are actually helping?
You’ll see fewer “fixes” during the draw, faster sight/dot acquisition, and a cleaner first trigger press. Track your reps and note what improves. Then confirm at the range with a short live-fire check. If accuracy holds steady as you add a timer, your dry-fire is transferring.
Training matters: Why did you choose this method over the others? Let’s talk.👇