
Earlier, I told you about part of my trip to SIG Sauer Academy with members of Team SIG, and our work on variable speed drills. That’s not all we did, though. Another part of the puzzle for doing well in action shooting is minimizing the amount of time wasted between each target.
The time between two shots on the same target is called a “split”, while the time between the last shot on one target and the first shot on the next target is called a “transition”. While fast splits sound really cool, learning to move quickly from target to target is where most people will find the biggest reductions in overall stage time.
There are two types of transitions, and this set of drills addresses the first kind: multiple targets (an “array”) from about the same location. In the third and last article in this series, we’ll talk about getting from position to position.
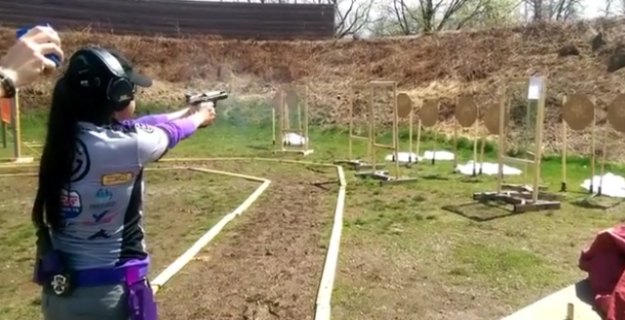
Several kinds of transitions were part of this stage
The first step is to look for the next target before moving the gun and sights to it. You should snap your eyes to the precise spot that you intend to shoot next as soon as you’ve finished the last shot on a target. Your head might need to follow, particularly for targets that are further apart, but the eyes lead and land first.
After you have locked your eyes on to the next target, follow with your gun. Your movement should be strong, even forceful, to drive the gun to the next target. Use your entire body to help get the gun where it needs to be, pushing through your core and hips, even your legs and feet. Not only will this engage your largest muscles in the movement, it will help keep your body solidly behind the gun to provide better recoil management.
Except for targets that are very far apart, keep your arms fully extended. For those, it can be more efficient to bring the gun in towards your chest in a “high ready” position by bending your elbows and keeping both hands on the gun, then moving the upper body as a unit before driving the gun back out towards the next target. The sequence goes: eyes shift, head snaps around and eyes lock on to target as gun comes in, body from feet on up push to face target, gun drives out to target and fire.
Watch how the head turns and the gun comes in after the second target
It’s a lot to think about, but it becomes very natural with practice. How to get those reps in? The main focus is the shot cadence drill, along with its many variations.
Shot Cadence Drill
This drill requires three targets spaced close together – no more than a target width apart. It can be performed at any distance but has the most value between about three and fifteen yards.

The goal is to shoot two rounds at each target with the same split and transition times, so that it is impossible to tell if you are shooting the second round at one target or the first round at the next target. Use a shot timer to keep yourself honest.
#transition work with #TheHawk
A video posted by Annette Evans (@blastingbeauty) on
This shot cadence drill almost perfectly blends splits and transitions
If you are having trouble with getting a perfectly even cadence across each target, try slowing your splits to match the transitions you are capable of, then speeding them both up together.
A video posted by Annette Evans (@blastingbeauty) on
This stage had arrays of three targets, with three shots required on each.
You can also start with a Bill Drill – six rounds – all at one target. Maintain that exact cadence as you push yourself to shoot first four rounds on one target and two rounds at the next, then two rounds on each target. You’ll find shots stringing horizontally across the targets at times, but continue working until you are able to put both shots into the highest scoring zone of each target.
Variations
Repeat the drill in the opposite direction than you started. You might feel awkward or go a bit slower, but with work, you will soon be able to go either way comfortably.
Next, try shooting the two outside targets before engaging the middle target. The first transition will be just a bit longer than the second, but you should strive to make them as equal as possible.
And finally, you can also work on this drill in dry fire, an especially good place to figure out how to get your body moving to support your transitions. Go get to work, then come back and tell us how you’re doing with it!
Make sure you stay tuned, because I’ll be putting up another article in a few days that details more of what we went over at the SIG Sauer Academy with the rest of Team SIG.